Get athletes onboarded, and get programs deployed
FYTT is an extremely powerful platform, and it might feel a bit overwhelming at first. But you'll find that everything is rather intuitive, so don't worry. This quick guide will walk you through the basics. If you don't stop to explore other features along the way, you should have a basic program deployed in 15 minutes or less.
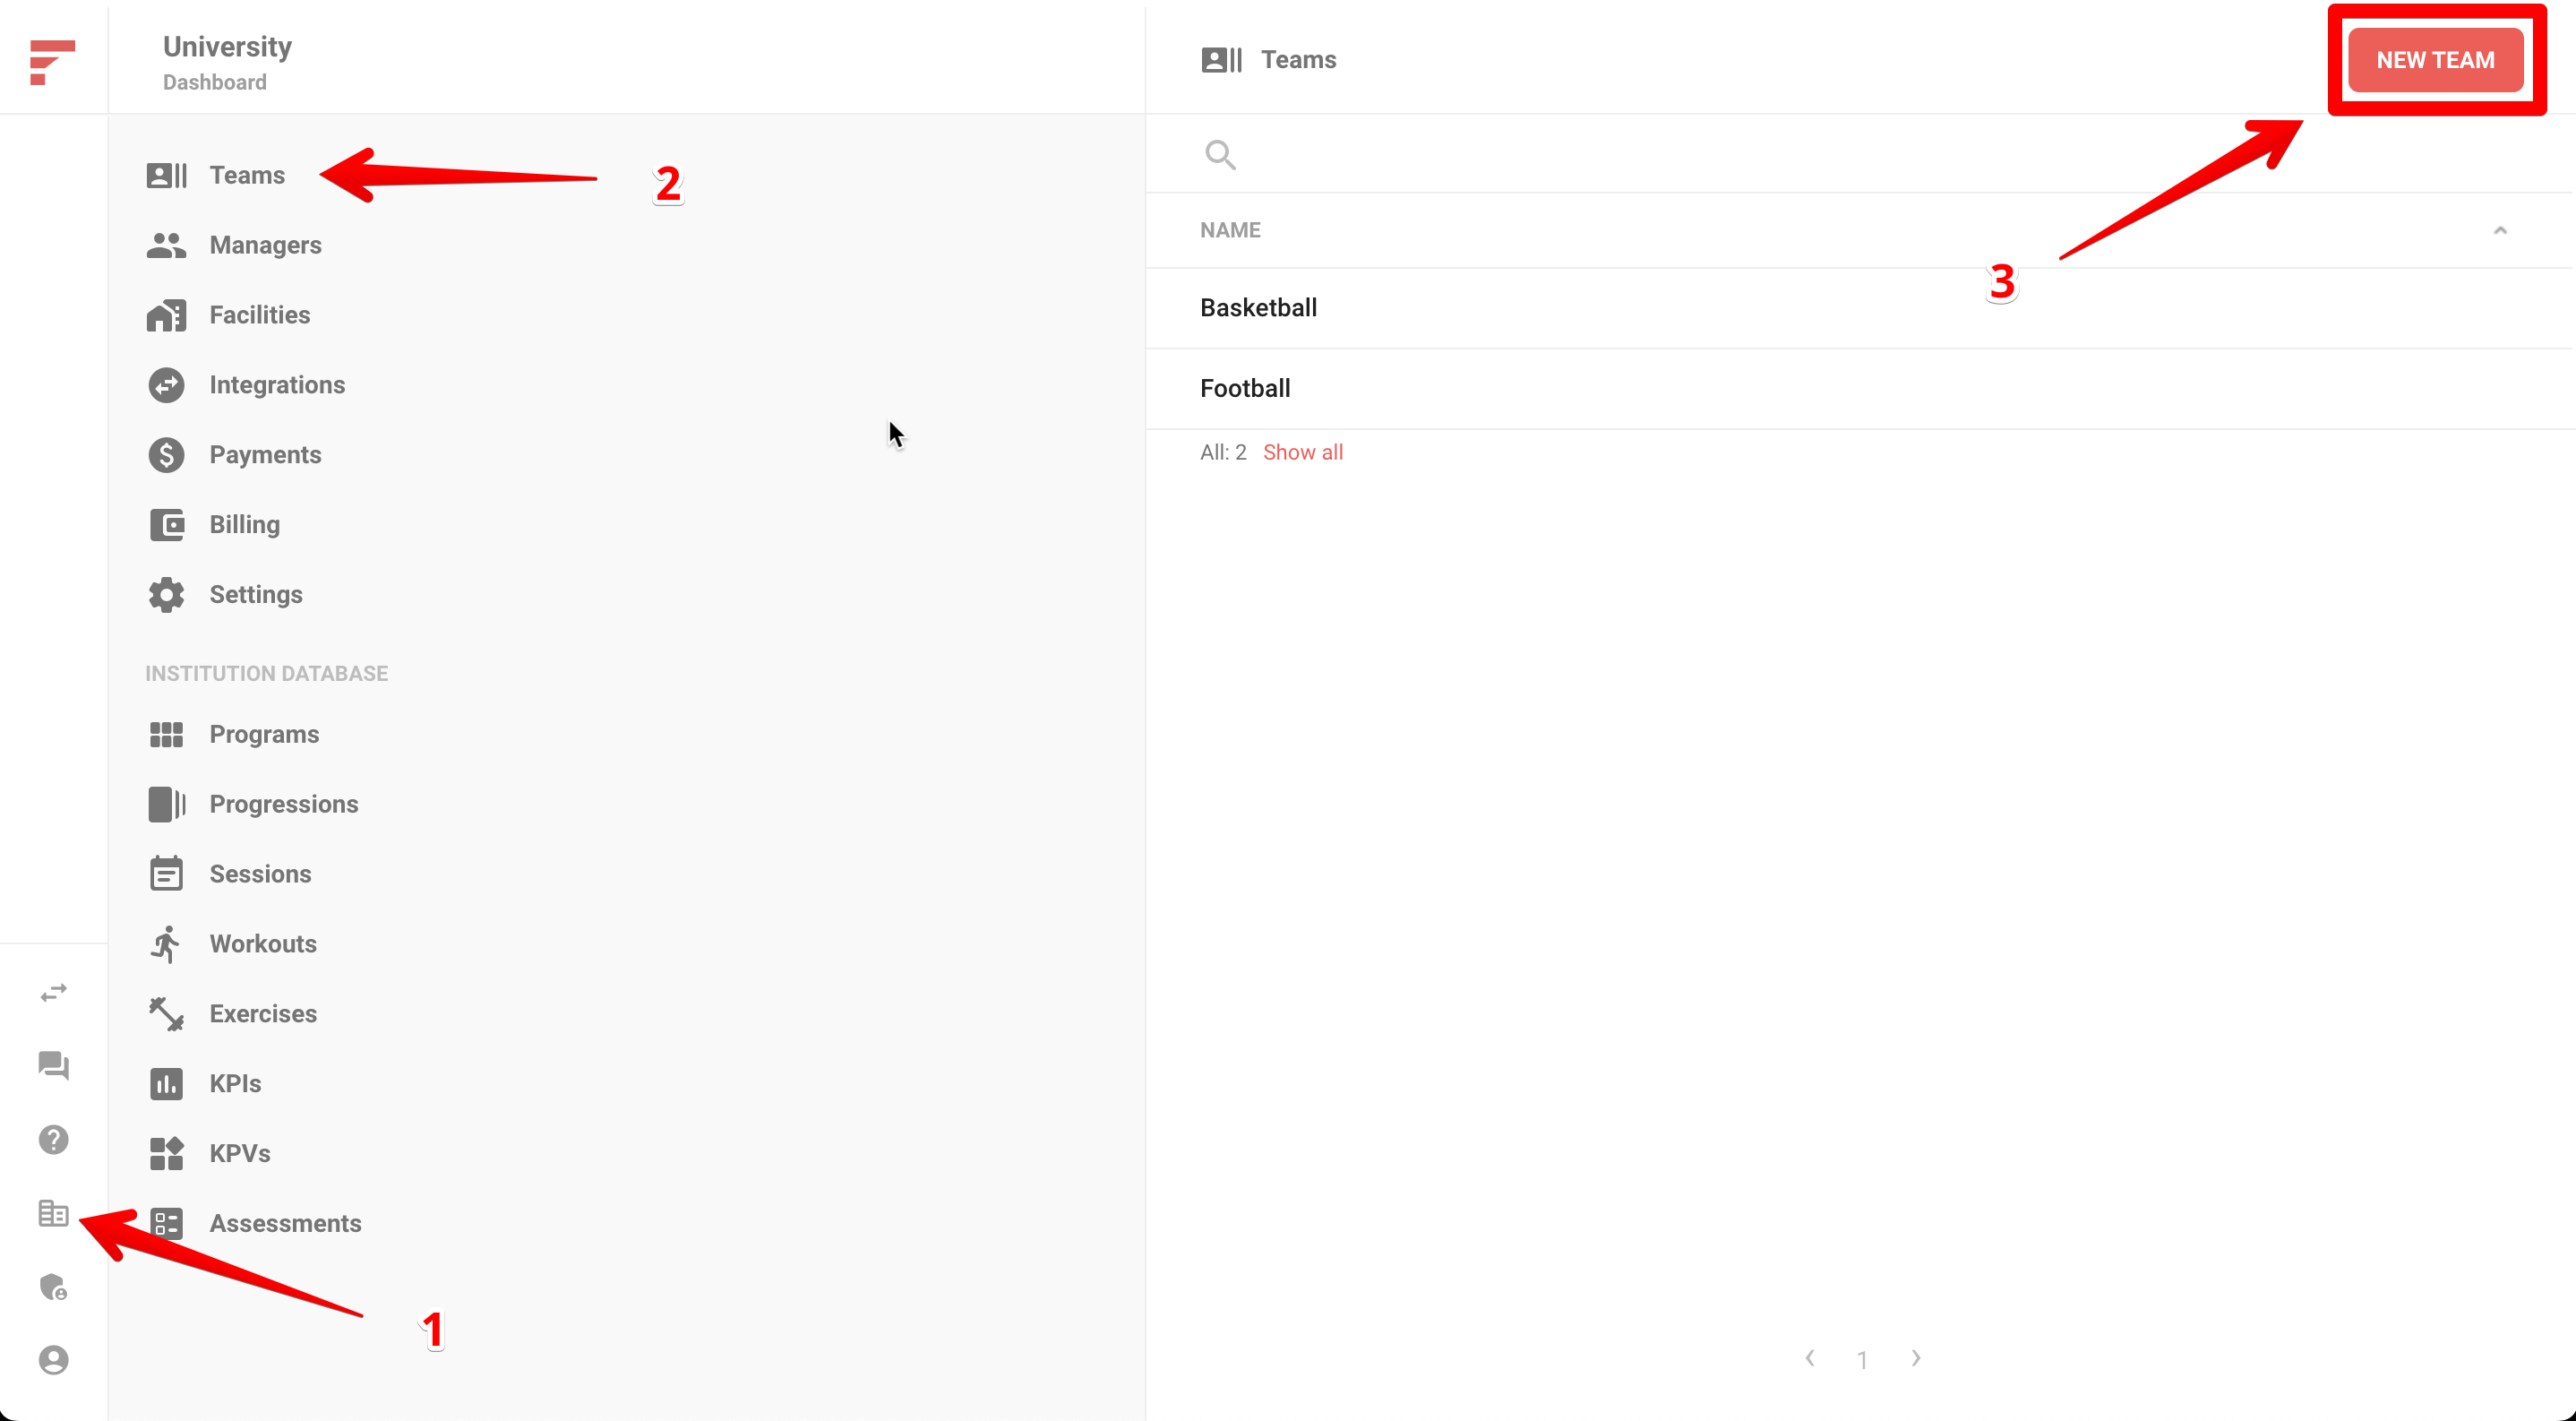
CREATE A TEAM
A team allows you to manage a roster of athletes, and to organize their training programs and training data. We created a sample team for you when you first signed up, so you can work within that team if you want, or a create a new one from scratch.
To create a new team, navigate to your institution dashboard. The teams index should be displayed by default, so you can click the "New Team" button in the top right to create new team.
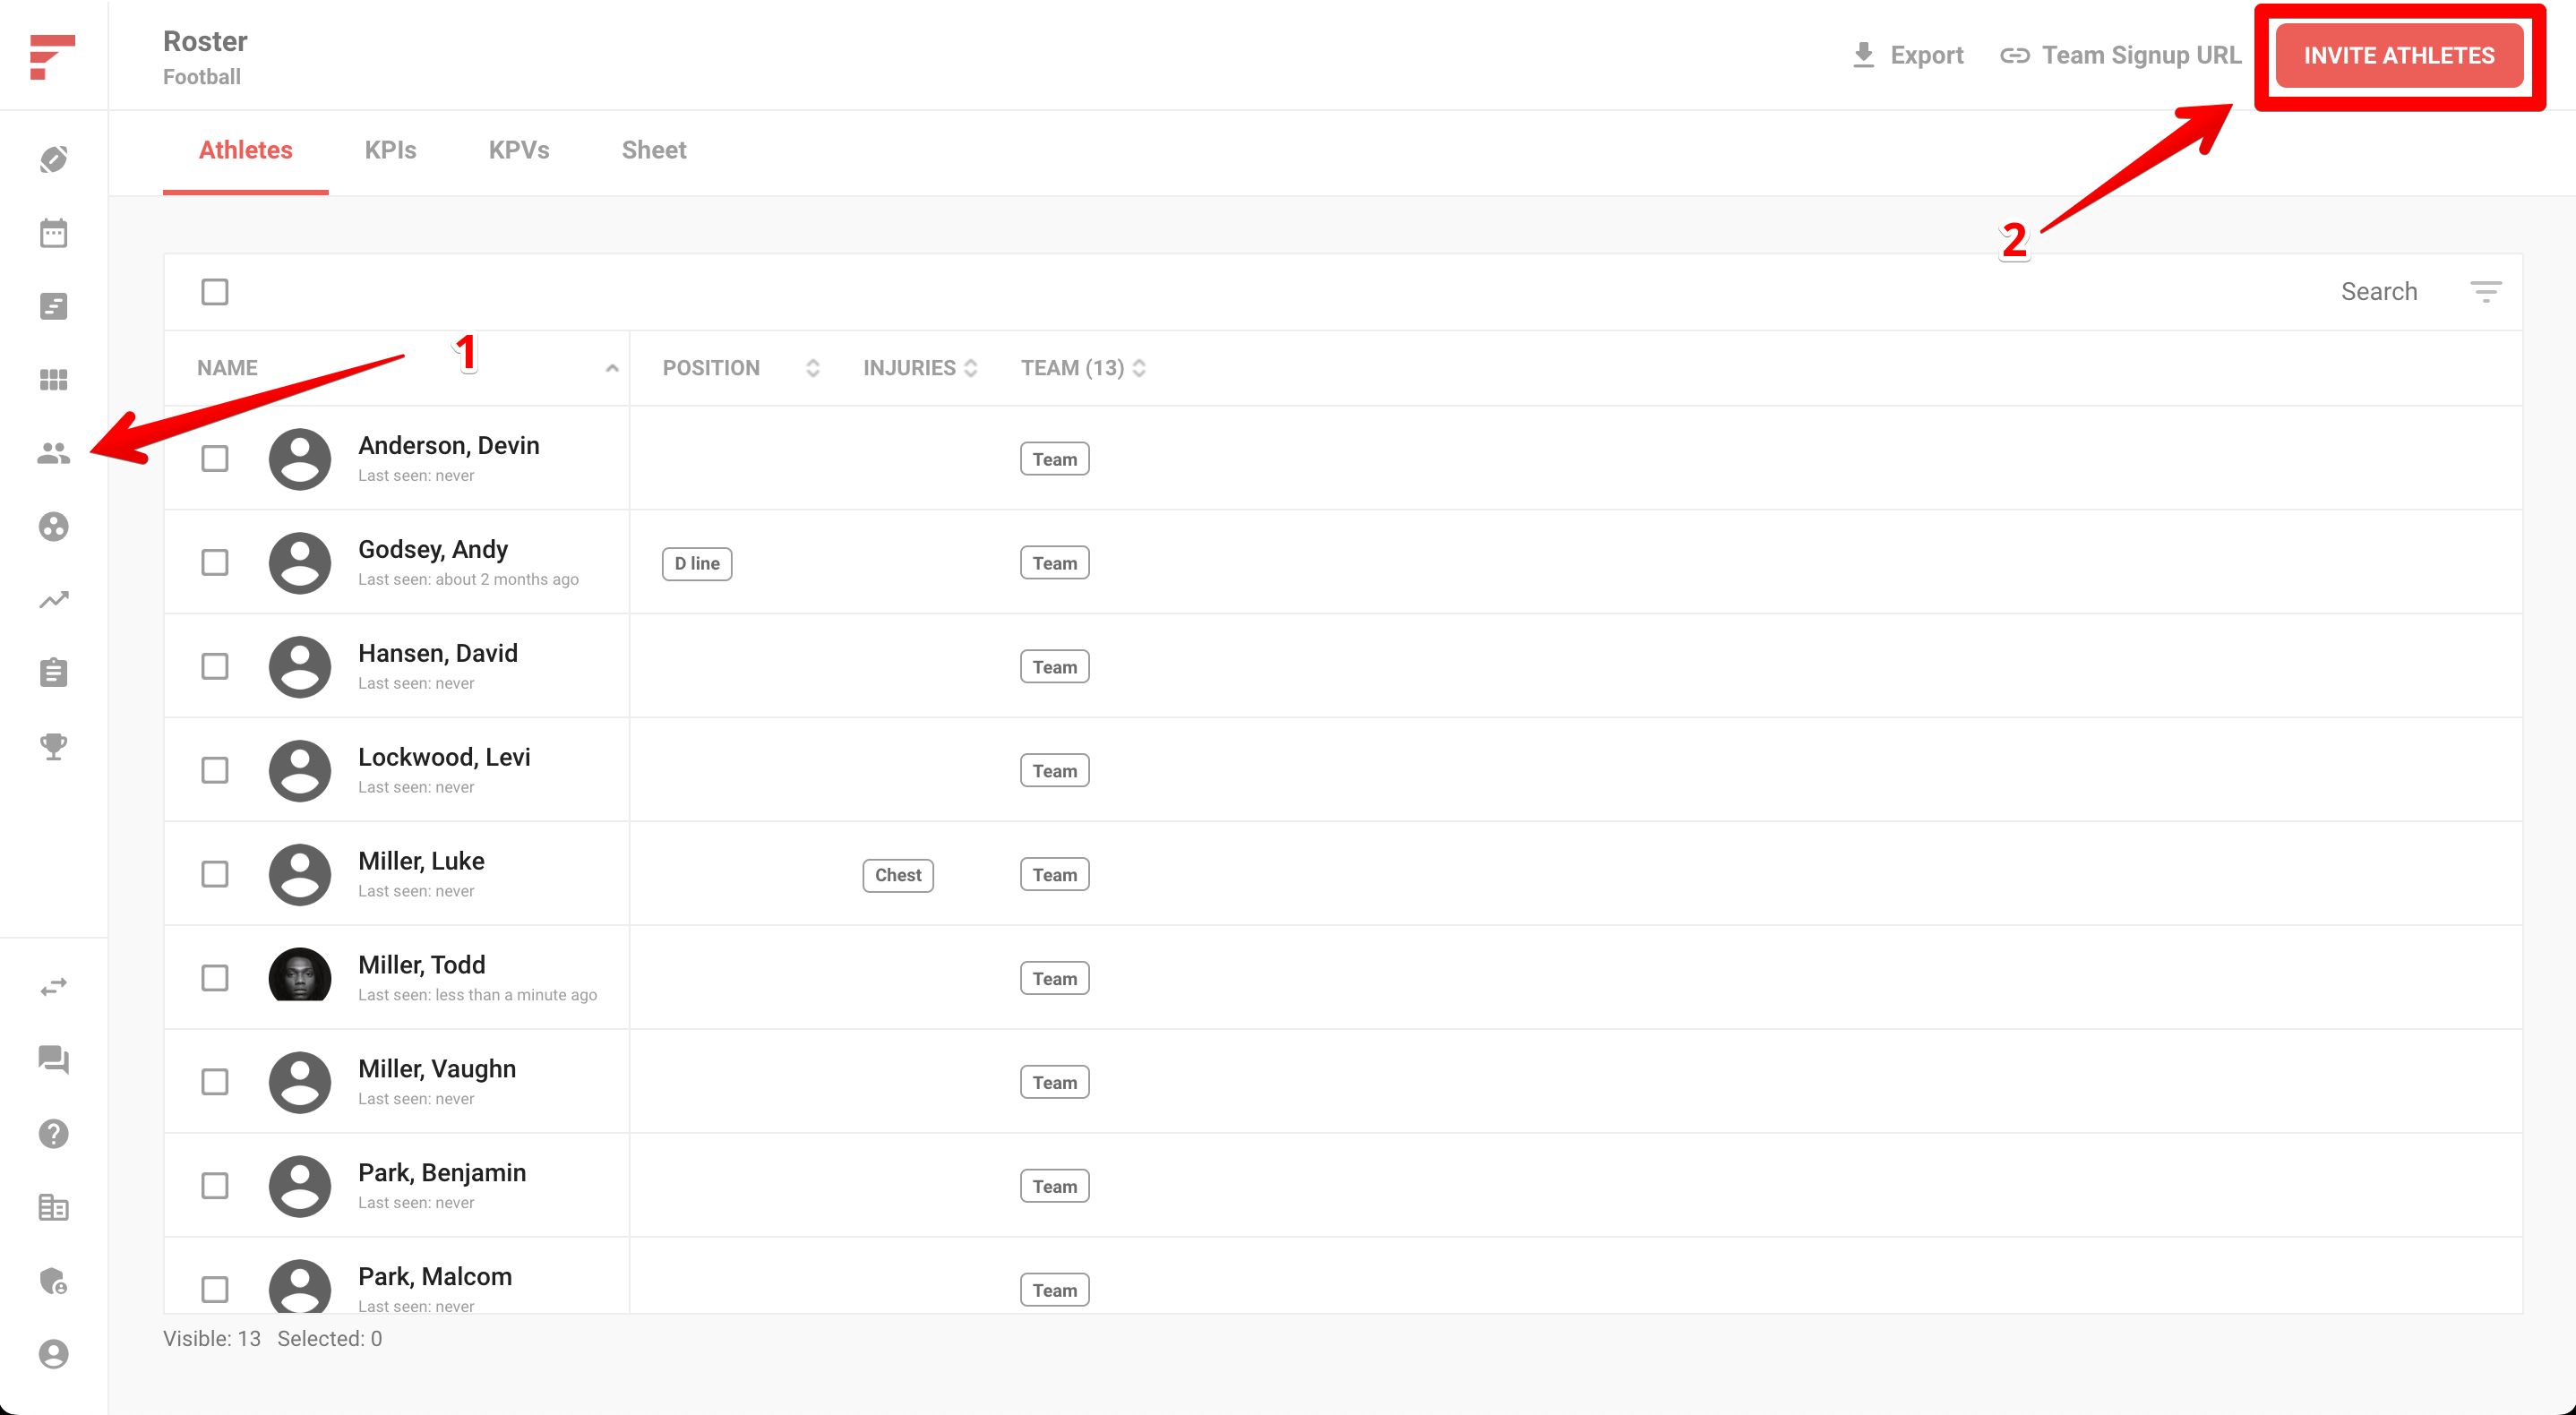
INVITE ATHLETES
You can add athletes to the roster in one of two ways: 1) by sending out the team's unique URL, or 2) by sending an email invite from FYTT.
For this guide, we're going to use the second option. Navigate to the Roster and click on the "Invite Athletes" button in the top right of the page.
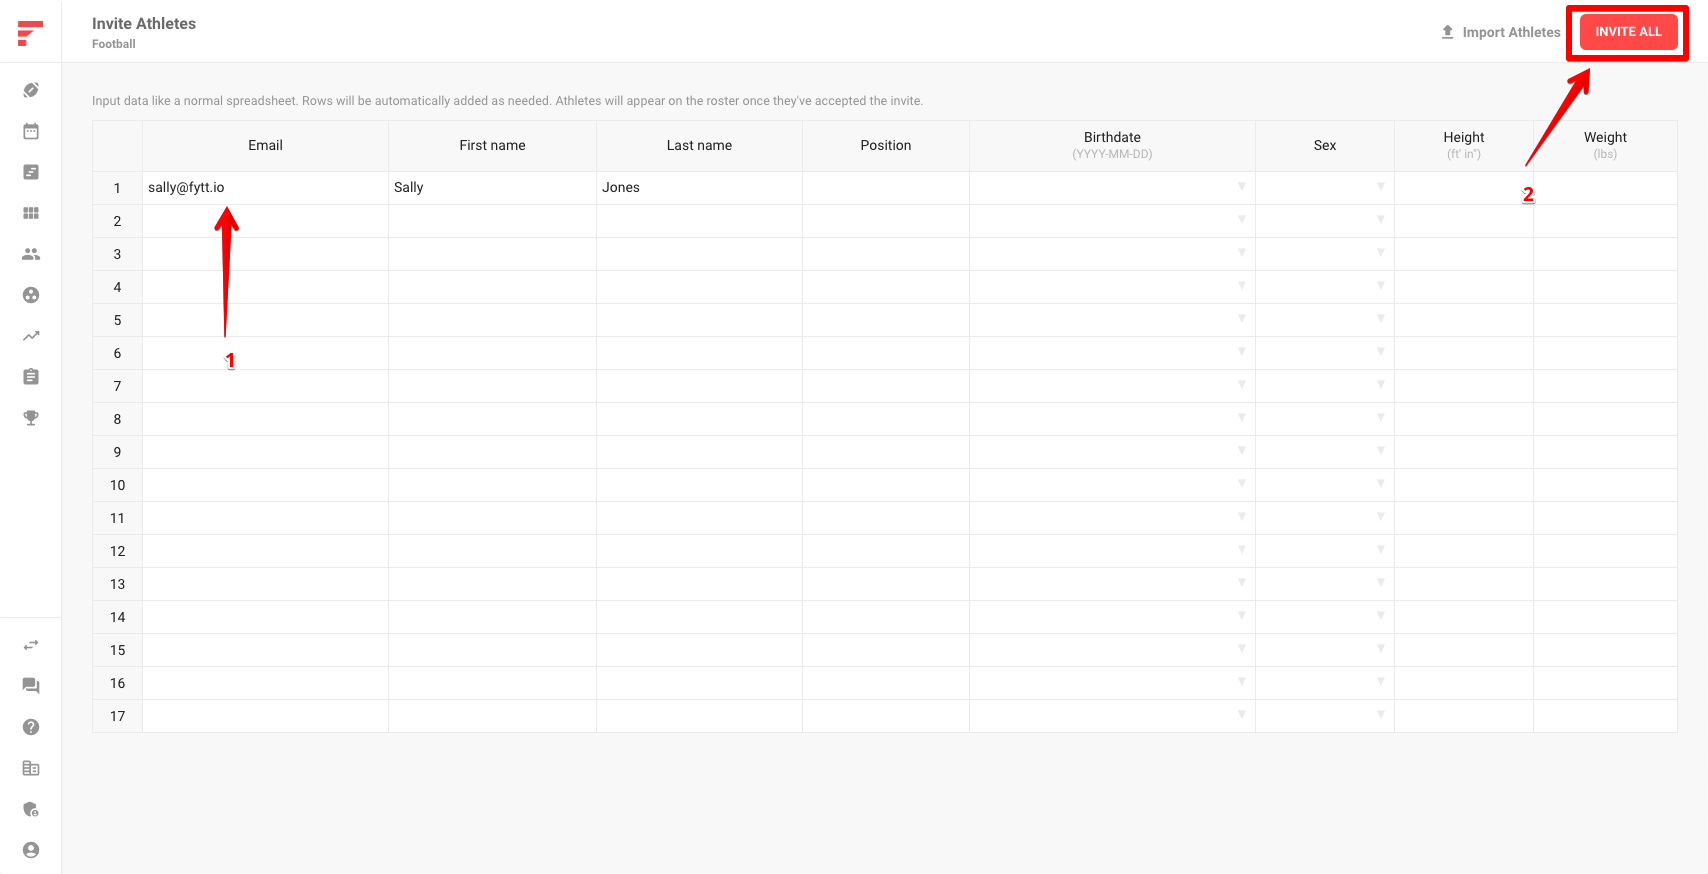
This drops you into a spreadsheet-like interface that allows you to send emails in bulk. Type in your email address, then click the "Invite All" button to invite yourself as an athlete to the team.
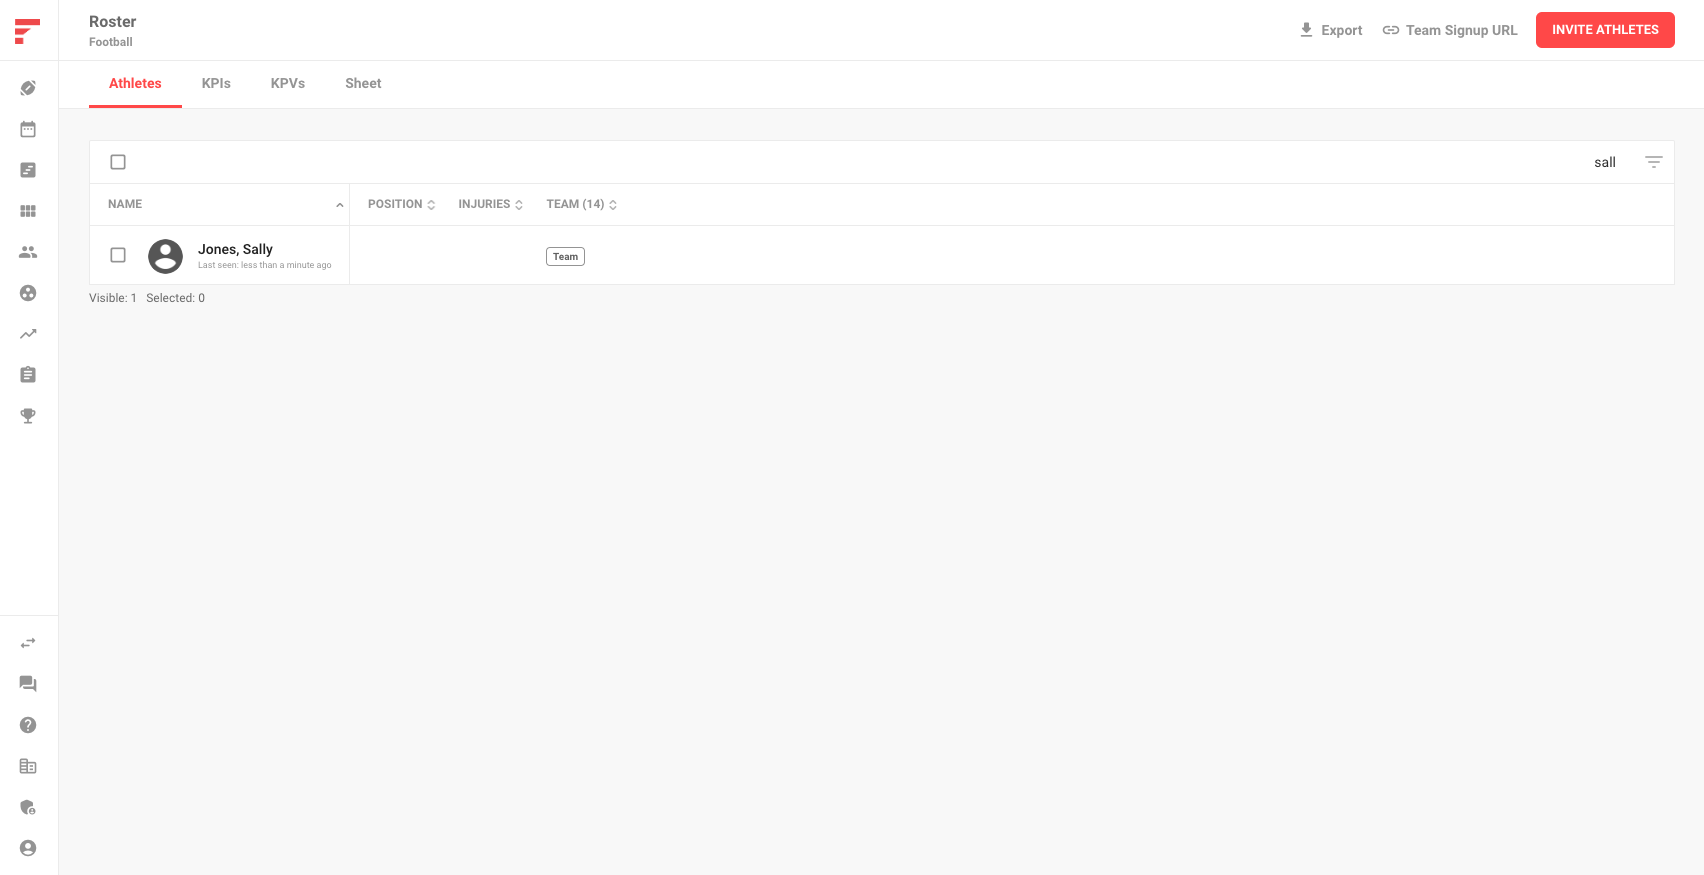
You should get an email in your inbox inviting you to join the team as an athlete (check your junk mail if you don't see it after a bit). Click the "Get Started" link in the email to accept the invite. Then navigate back to the roster, and you should see yourself on the list.
You're now ready to write a test program for yourself.
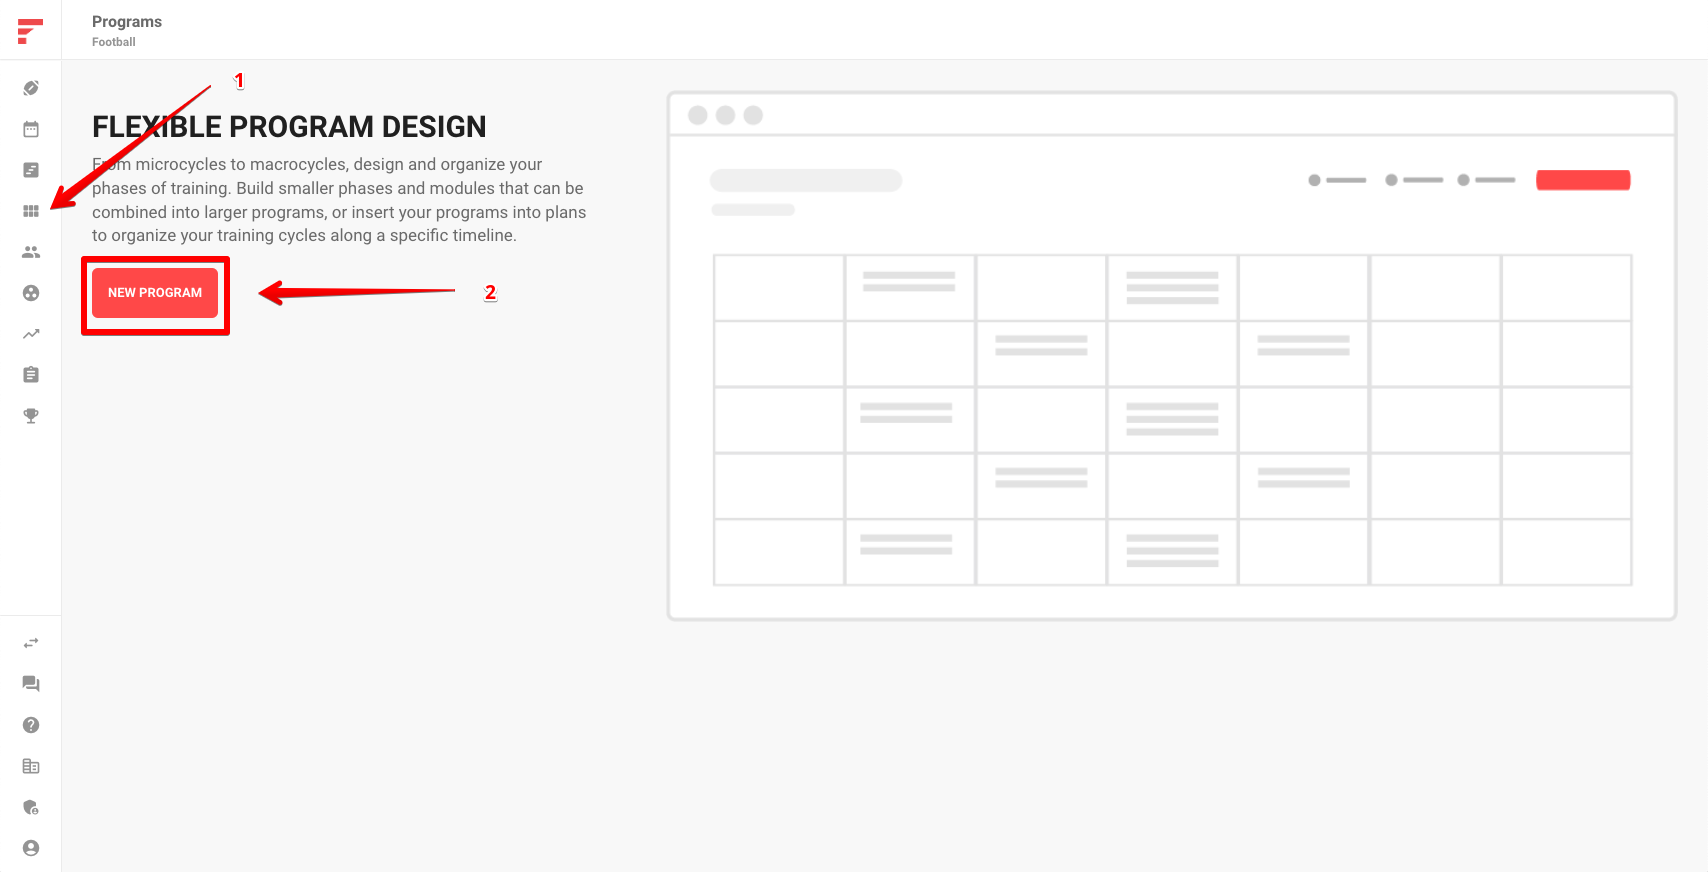
CREATE A PROGRAM
A program is simply a group of sessions organized over a specific time period.
To build a program, open the main menu and navigate to the team's program section. Click the "New Program" to open the slide out form. Give it a name, and enter in a value of two for the number of weeks.
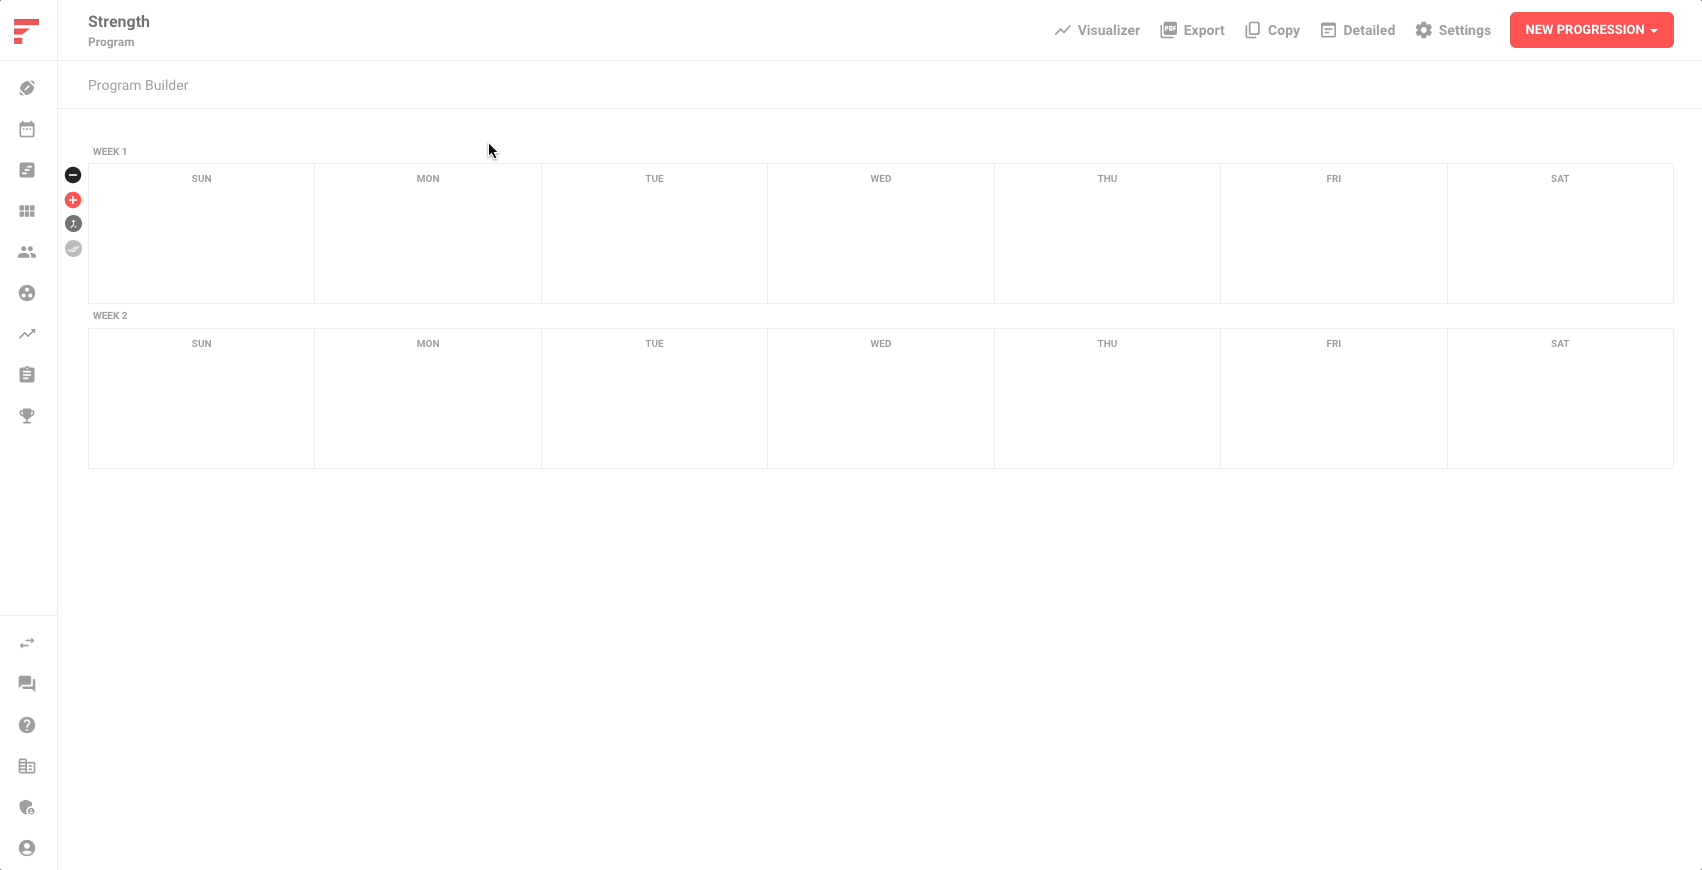
You're now in the program builder. Click on the box for the first Monday to open up the session interface. Using the session interface, you can add individual workout modules from scratch, or quickly search and add one from your workout database (you probably don't have any workouts in the database yet). Click the "Create New Workout" button to start building a workout from scratch.
You're now in the workout builder. This is an extremely powerful interface, but we'll just cover the basics for now. To get started, click the "Add set" button in the exercises section of the interface. This adds a new row to the workout and opens up the exercise parameter interface, which allows you to specify any prescription variable you need.
For this example, click the "Reps" box and the "Weight" box, then close the exercise parameters. Type in "Bench Press" for the exercise, 6 for the reps, and 135 for the weight. Close the exercise interface, then right click the row to bring up the context menu. Hover over the "Duplicate" option, then click "2 times" to duplicate the set twice. Close the workout builder.

We now have a basic workout of 3 sets of bench press for 6 reps at 135 pounds. For more info on building workouts, see the Workouts guide.
For the sake of simplicity, we'll just copy this workout to the next Monday, as well as both Wednesdays. To do this, simply hover over each day and click the empty circle in the top left corner of the box, then click "Add to selected" to the top right of the program builder. Start typing "Bench Press," then select the bench press workout from the dropdown list once it appears. Click the "Add" button to add this workout to all the selected days.

We now have a program that we can work with. This doesn't even begin to illustrate the power of the program builder, so you might want to checkout the Programs guide to get a more in-depth look.
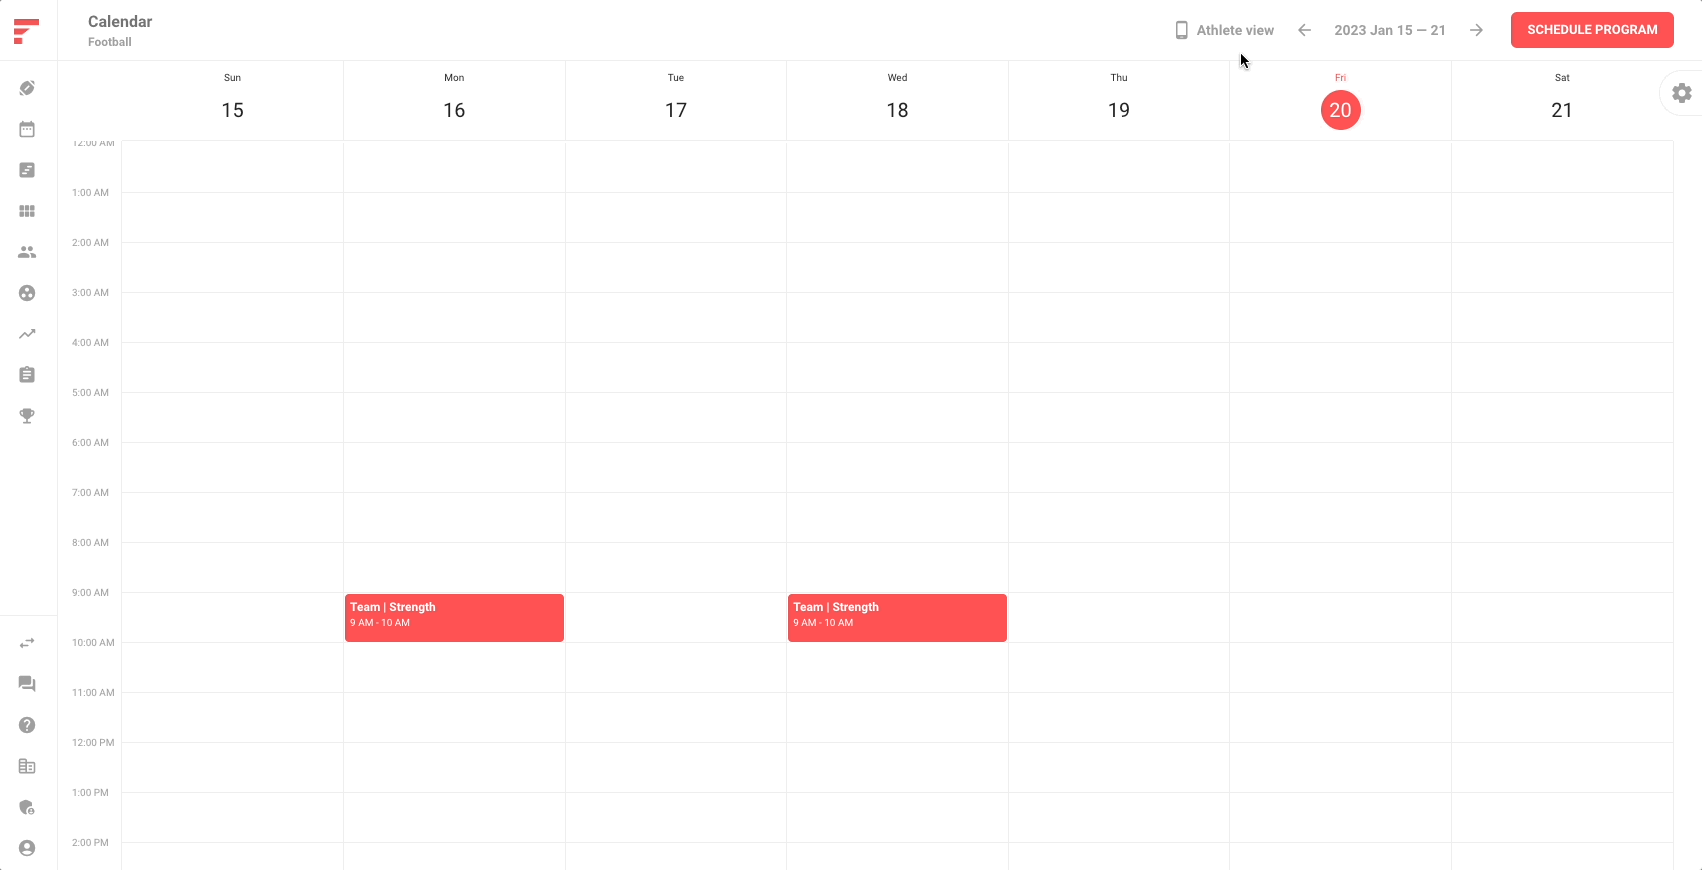
SCHEDULE A PROGRAM
Open the main menu and navigate to the calendar. Click the "Schedule Program" button in the top right of the screen to open up the program scheduler slide out. Select the program you just created, then input a start time and end time (the default start date is Sunday of the current week, and the default recipient for the program is the whole team).

You'll notice the sessions appear on the calendar for the days you built in the program. Since we scheduled the program for everyone on the team, all athletes will now see these sessions when they view the app on mobile.
PREVIEW ATHLETE EXPERIENCE
If you want to quickly preview what the athlete sees when they log in, you can use the athlete simulator by clicking "Athlete view" in the top right of the screen. From the athlete simulator screen, select an athlete from the menu in the top right to preview their experience in the mobile screen. Then navigate to one of the days that a session was scheduled on the calendar.
You can start the session and record the workouts as if you're the athlete, but know that the simulator shows you live data. This means that any workouts you record are recorded as if you're the athlete on their own phone.
BEYOND THE BASICS
Hopefully this quick tutorial helps get you started, but it only scratches the surface. Here's a few other features you might want to check out:
- KPIs: Create key performance indicators to track athlete performance, and use them to individualize exercise parameters.
- Groups: Organize athletes into groups and assign programs at a group level. You can also add logic that automatically adds athletes to groups based on the data you collect.
- Plans: Instead of scheduling programs directly on the calendar, use plans to schedule and organize programs for many athletes and groups.
- Reports: As you assess key performance indicators and collect data on key performance variables, you can build reports to track progress over time.
Our FYTT 101 article briefly touches on all the major features of the platform and links to more in-depth guides for each one. Please don't hesitate to reach out if you have questions on anything.